Hurtling down your favourite trail centre singletrack you’d be forgiven for not giving the build process a second thought. But as the smile on your face grows and your bike drifts predictably into a perfectly placed catch berm, none of this is happening by accident. Trail building is an art. And it’s a bloody tough art to master.
We spoke to Rowan Sorrell, who’s clearly conquered the craft of sculpting the land, to find out more. The Welshman has been riding and racing bikes for years, and in 2004 started up Back On Track – a trail building company that’s created some of the most popular tracks in South Wales. A partner at BikePark Wales, most of you will have ridden at least one of his creations while on a jolly with your mates.
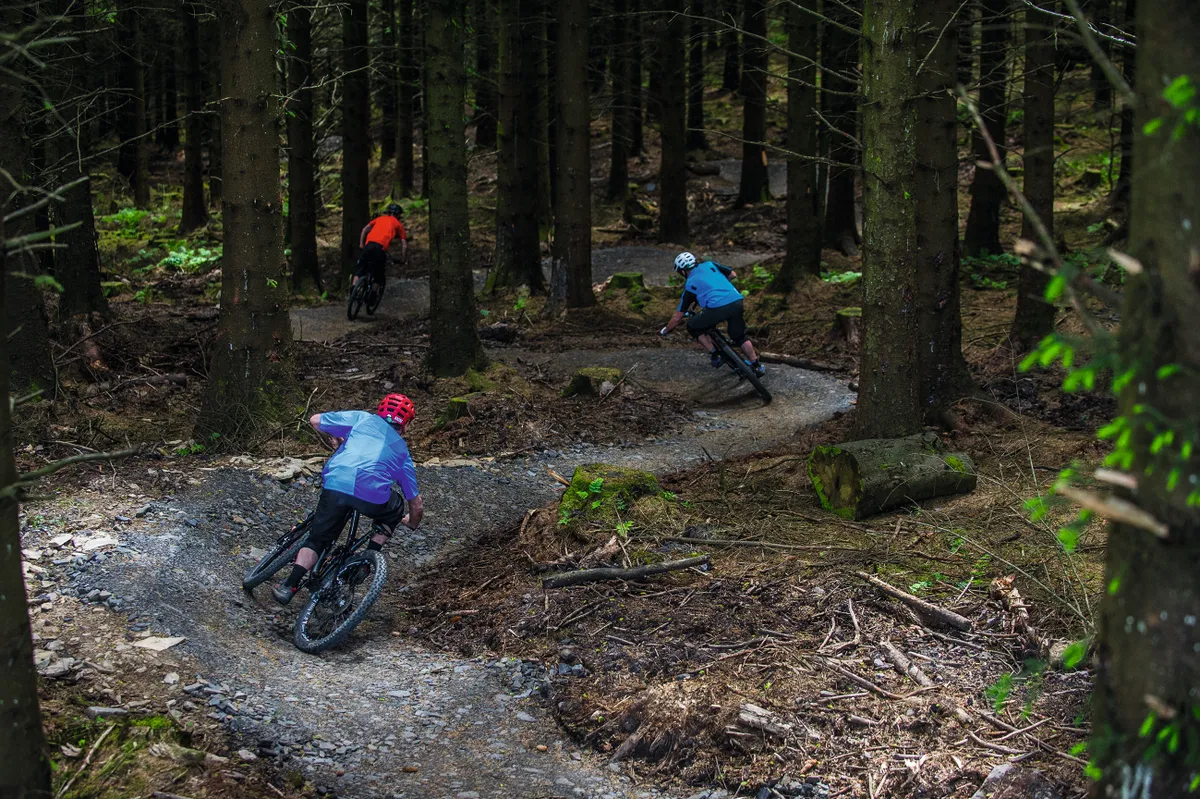
So just how hard is it to make a good trail?
“That depends on the style of trail and who you’re trying to make it appeal to,” says Rowan. “A downhill track can be amazing if it’s steep, challenging and packed with plenty of natural rocks and roots. But at the same time, a downhill track that’s almost entirely manmade, with big features and jumps built in, can be fast, wild and super-fun to ride.
“We try to look at who the trail’s meant for and what the terrain has to offer, and then extract the best from it. If the hillside has incredible natural features and terrain, we use it – there’s no point trying to beat nature.
"If the hill’s quite bland and lacks features, we create a track that’s challenging in a different way. It’s about finding the balance, making good decisions and shaping the features well, all of which comes with experience.”
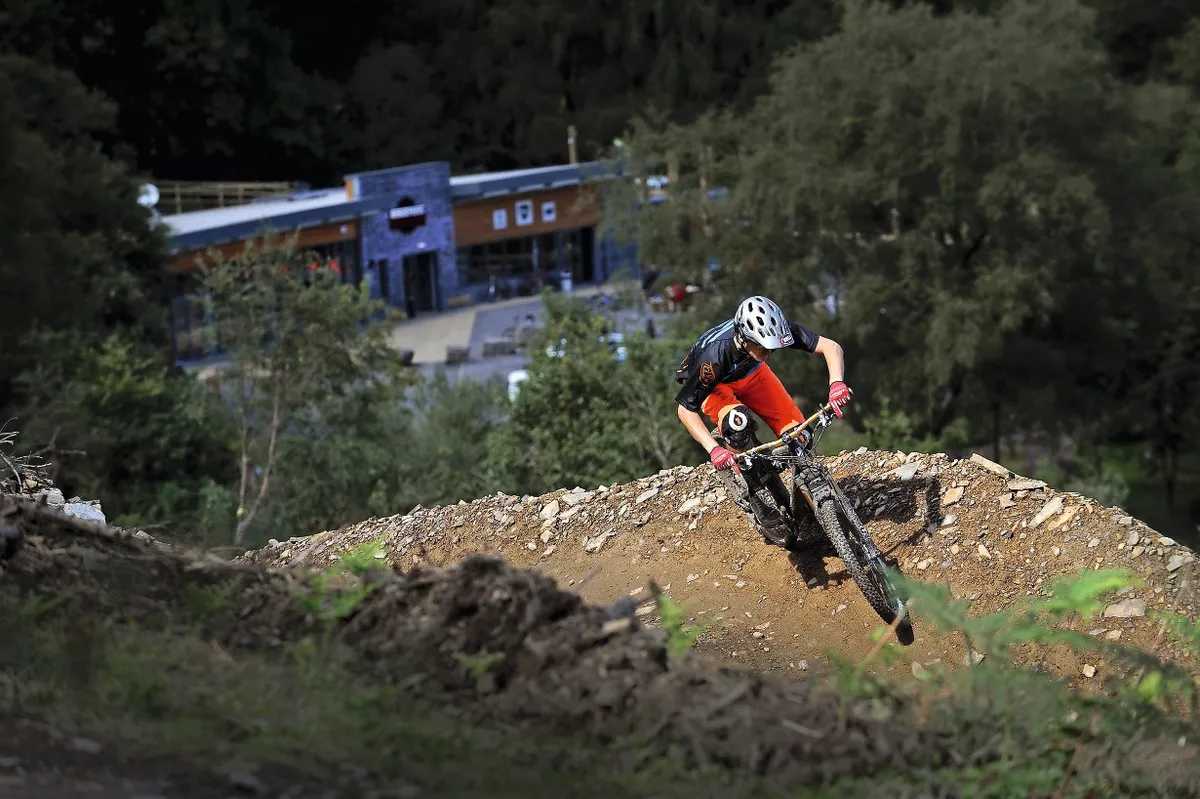
Rowan reckons that a huge part of what makes a good trail comes down to what people enjoy doing when they ride. “When I first started out I wanted to build more ‘payback’ into trail centres,” he says. “I felt that there were often long slogs and not a lot of reward for the effort that you put in. I don’t mind climbing or pedalling one bit, but I only do it to get the thrill of a good descent at the other end. For me, that’s the most important thing we’ve brought into our trail designs and processes – ensuring that the trail rewards the rider for the effort they put in. They need to leave the hill buzzing and wanting to ride it again. Otherwise they may as well cut their losses, save on their fuel bill and go for a pedal around the local park.”
So, does the perfect trail exist? “I often get asked what makes the perfect trail, but I don’t think there’s such a thing,” says Rowan. “If there was, we’d probably give up building. You have to feel that it can be done better and improved upon, or you just become complacent. Sometimes when you ride a trail it can feel perfect in that moment, but different trails work for me when I’m in different moods. Sometimes I want to shred fast, flowing jump lines, sometimes I want steep, tech and gnarly. The best trail developments allow for a variety of terrain and styles within a set of trails.”
So, how exactly do you go about building a mountain bike trail? Over to Rowan...
How to build a trail – The preparation
1 Confirming the brief
Planning out a trail can be a relatively simple process or it can be a complete monster, taking a huge amount of time and effort. It really depends on the site, the client and the project. The vast majority of projects we’ve worked on over the years have involved planning an official trail on publicly-owned land, such as at a trail centre. The first step is to meet the client and run through the outline brief, if they have one. What is it that they want from us – a bike park, a cross-country trail or some other concept? We discuss who it’s intended for, because that’s crucial and will steer us into the discussions around trail grading and style.
2 Scoping out the site
Then we can start looking at paper and digital maps to assess the scope of the site. We start to learn the constraints, identify any restricted areas and put some thoughts together. The next step is where it starts to get interesting. We head out and explore by foot, by bike and by vehicle, looking to learn the landscape and start to bring the maps to life. This is where we can start to see the trail flow, where we want to go to due to good terrain, viewpoints or features, and where we need to avoid (cliffs, boggy ground, archeology, etc). After lots of trial and error the form of the route starts coming together, but this takes many repeat visits and lots of uploading GPS data to plan the next steps. It’s like fitting a jigsaw puzzle together.
3 Pleasing all parties
On larger projects there are usually monthly project meetings and there can be many people involved. The local land or forest manager, archeologists, conservation managers, forestry operations planners, funders and planning departments all have to be consulted and the route adapted accordingly to be acceptable to all. Often the route you see on the ground isn’t the original preferred line – it’s a compromise to minimise impacts on other activities, such as forest production or archeology. It’s our job to then make the agreed line as fun and rewarding as possible, by adding shape, flow and features, so that when you ride it you’d never be aware that it wasn’t our preferred route!
4 Cutting through red tape
Many trails require planning permission. This is a process that’s often overlooked but can stall or even stop a project if there are strong local objections. We’ve had to attend planning committee meetings to put forward the benefits that a trail can bring and try to counter opposition. These are all things that go on in the background and can be quite time-consuming and costly. There’s a whole lot of red tape to get through in order to get a trail project up and running. While it’s not the stuff we enjoy the most (we’d rather be in the woods plotting and building trails all the time), we see it as part of our professional service to guide the projects from the initial enquiry, through the long planning process and then into the fun part – the building!
How to build a trail - The build
1 Choosing a build type
How challenging a build is and how we carry it out depends on the site and the ground conditions. Some sites are perfect for trail building – the soils are good and the stone content just right, so the trails can be formed relatively easily by cutting into the slopes and using material from on-site. Others are much more of a test. If the soils are poor and the ground conditions wet and boggy they can be long, challenging builds, which are really hard on our kit.
We hand build some trails and machine build others. Hand building is only really viable when the ground conditions are favourable, when the soils are right. It’s the best way because we can create perfect tight and twisty trails through a forest that feel like they’ve been there forever. The more challenging builds where ground conditions are bad can involve a lot of heavy plant and muddy work getting the stone to the trail.
2 Bringing in stone
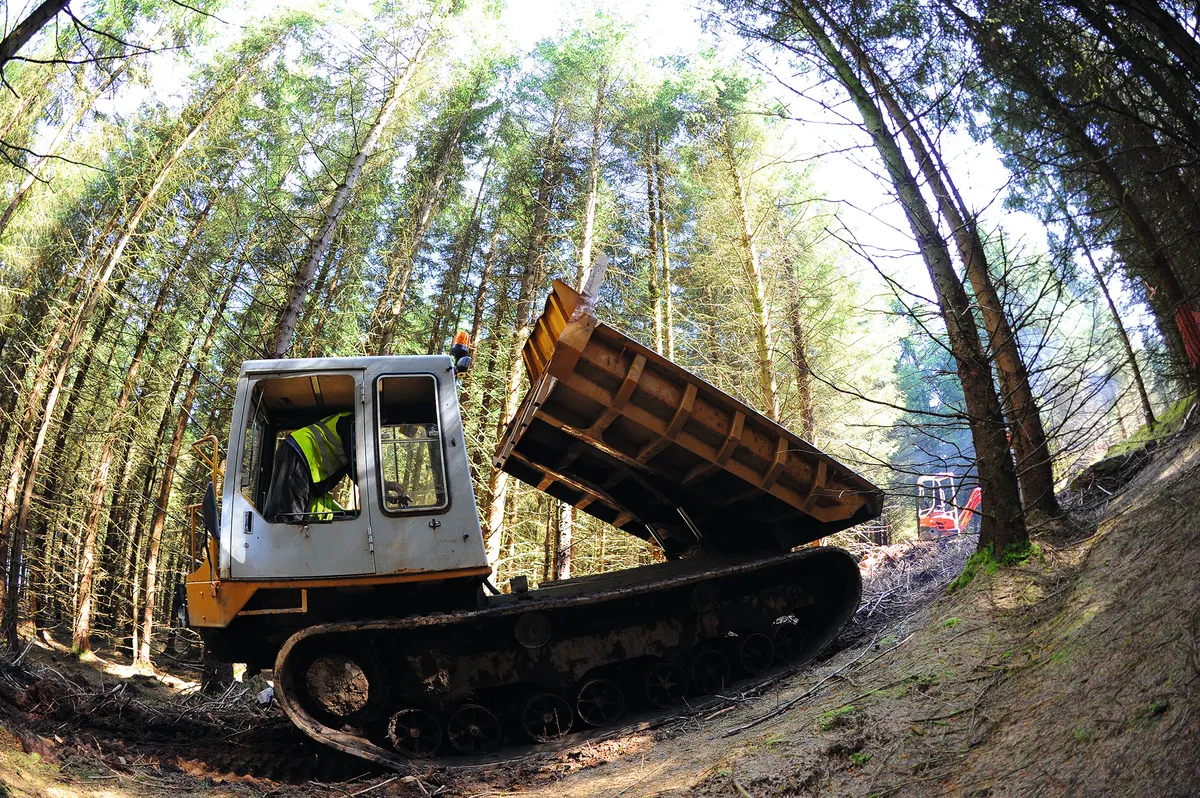
During the planning process for the trail we identify suitable stone drop points and access tracks from the nearest roads down to strategic points along the trail. Then, when the trail corridor clearance begins, we fell any trees required and trim back the branches to allow the access routes to be utilised.
Large tracked dumpers are then used to transport stone from the nearest road to the drop points along the trail – there’s usually one every 100m or so. The stone is then transported along the trail itself using either small tracked dumpers, quad bikes or wheelbarrows, depending on the space available and the type of trail that we’re building.
If you saw some of your favourite trails during their construction you wouldn’t believe the amount of plant, equipment and manpower it takes to get the stone down into the woods and along the trail, but if we’ve done our job well that’s not something you’ll ever think about when riding. The trails should just appear, with no signs of disturbance or major access tracks.
3 Forming the trail
The trail is shaped using excavators with tilting buckets to aid in the forming of cambers, berms (banked corners) and jumps. Some of the large berms and jumps are built from literally hundreds of tonnes of earth… each!
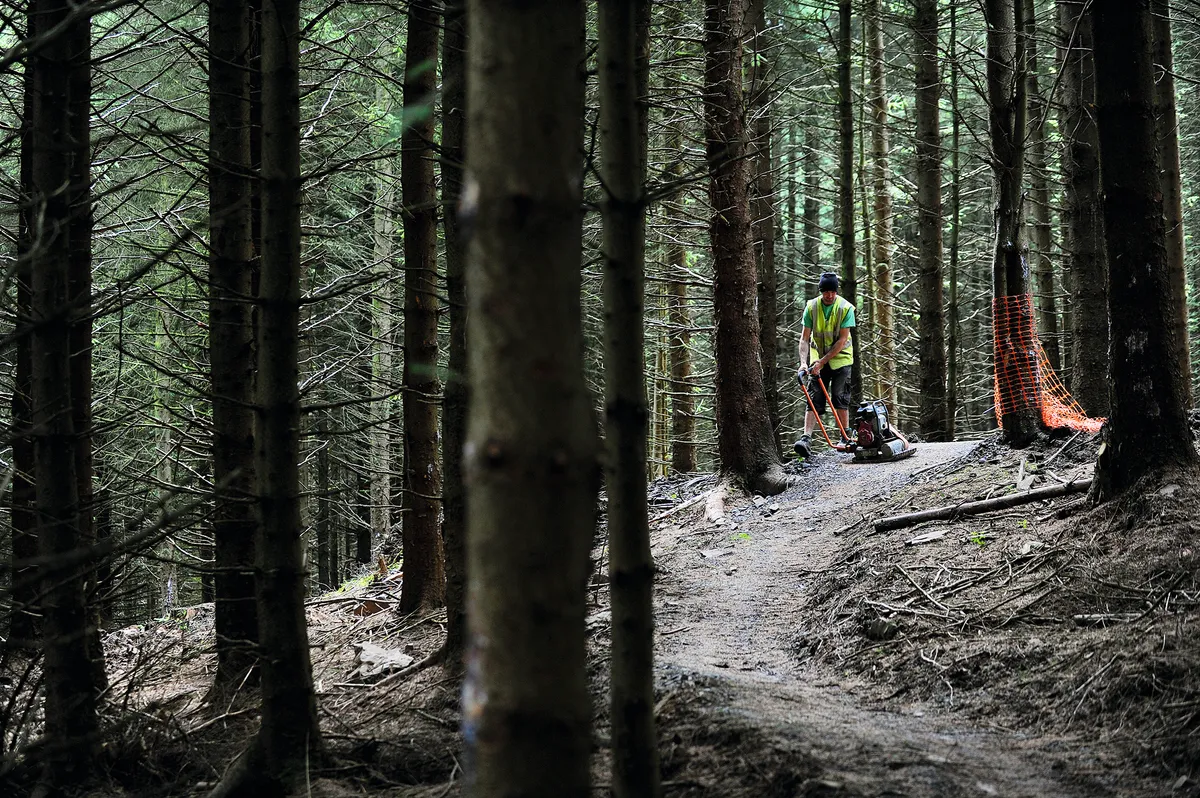
We try to keep the trails up and out of the ground but will cut into the slopes and ground to form bowls and berms as required. The crucial bit is getting the drainage profiles right so that water runs off the trail and doesn’t cause excessive damage. Once the trail is shaped from the sub soils, then the stone is laid on top, raked out by hand and then compacted using wacker plates.
4 Letting it settle
We then test ride the trail and create a ‘snagging list’ of tweaks and improvements that can be made. These are carried out and then the trail is compacted again. Trails take a good while to settle and consolidate (one to two months), and it’s only after this period that they’re ready to be ridden.
This can be a frustrating time for trail builders, when riders ignore the signs and barriers that we’ve put up and ride down freshly-built trails, causing damage that the teams have to go back in and repair. It’d be good if riders would consider all the hard work that goes into creating a trail, and just wait until they’re ready.
5 Last few tweaks
Finally, we install all of the trail signage, waymarkers, information panels and warning signs, and prepare the trail for its opening, which is when we get to enjoy what it’s all done for – the ride!
MBUK’s five essential trail building tips
- Get permission! Don’t go digging on private or public land without it, or you could end up on the wrong side of the law.
- Respect other builders’ work. Don’t destroy the fruits of someone else’s labour to satisfy your need to dig.
- Don’t use rotten logs to build your berms or jumps – they won’t last and your line will turn into compost before you know it.
- Plan your line out carefully before you put spade to dirt. Remember, there’s no ‘undo’ button
in real life! - Mother Nature can be a delicate beast, so avoid chopping down trees, damaging plants and disturbing animals.
You can read more about Rowan Sorrell and the trails he's sculpted in his own backyard in the lastest issue of MBUK. Find out more about the latest issue HERE. You can subscribe to MBUK here and check out our Facebook, Instagram and Twitter accounts for all of the latest mountain bike action.
And don't forget to sign up to our newsletter!